...
export class UserService {
  ...

  constructor(private http: HttpClient) { ... }

  public getUsers() { ... }

  // 코드 추가
  public getUser(id: string) {
    // 특정 user의 데이터를 Get
    return this.http.get(`${this.Uri}/${id}`);
  }

  // 코드 추가
  public postUser(user: any) {

    user.id = this.nextUserId;

    // form을 통해 전달 받은 값을 저장
    let data = {
      "id"        :   user.id,
      "name"      :   user.name,
      "email"     :   user.email,
      "password"  :   user.password
    };

    // data에 저장된 데이터를 JOSN 형식으로 변경하여,
    // Uri로 Post 진행
    // Return 값은 Response가 반환됨
    return this.http.post(this.Uri, JSON.stringify(data));
  }
}
src/app/app.component.ts 수정
...
export class AppComponent {
...
constructor(public service: UserService) { ... }
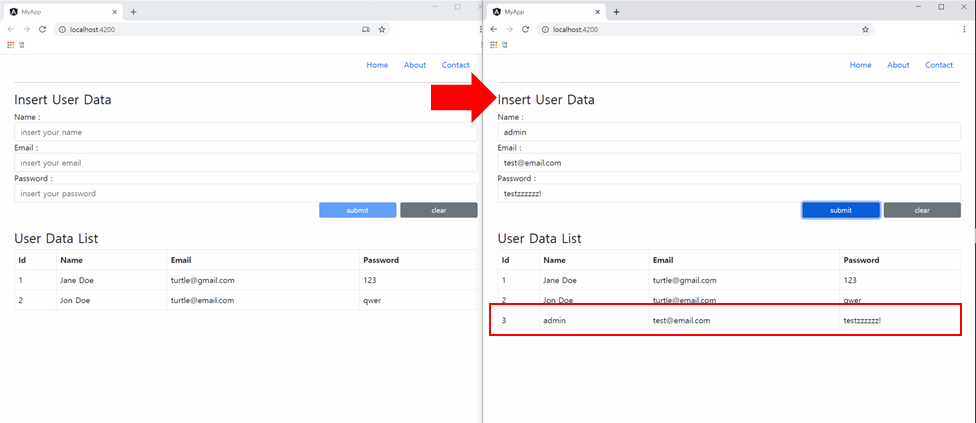
public onSubmit(form: FormGroup) {
console.log(form.value)
// 코드 추가
if( form.value.id == null) {
// postUser 서비스 함수 이용
this.service.postUser(form.value)
.subscribe((resp) => {
console.log(resp)
// Response를 통해 전달 받은 Status가 201일 경우,
// user 데이터를 갱신
if(resp["Status"] == 201) {
this.service.getUsers()
.subscribe((data) => this.users = data);
}
})
}
}
}
src/app/app.component.html 수정
<div class="container">
<header>
...
</header>
<hr>
<div class="row">
<div class="col-md-12">
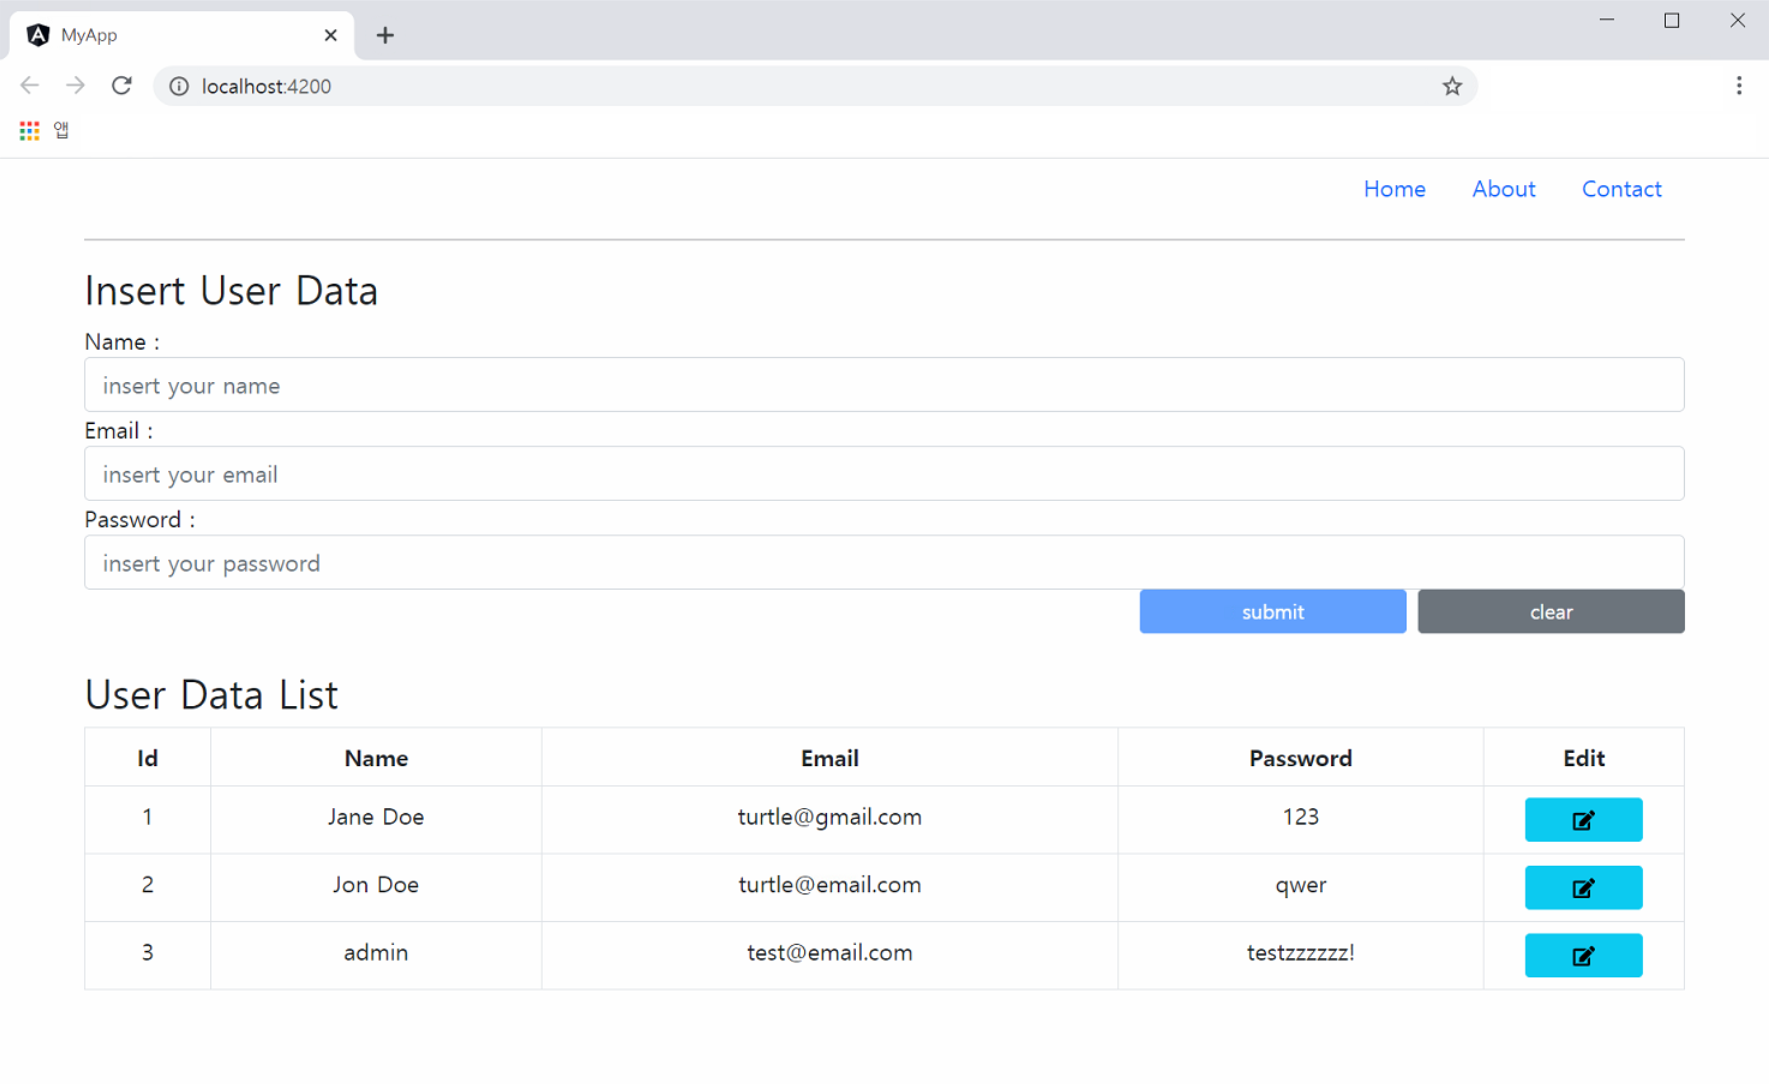
<h3>Insert User Data</h3>
<form method="post" #form="ngForm" (ngSubmit)="onSubmit(form)">
<input type="hidden" name="id" [(ngModel)]="service.selectedUser.id">
<div class="form-group">
<label for="name">Name : </label>
<!-- 입력 여부를 파악하기 위한 구분자 required 추가 -->
<input type="text" name="name" id="name" class="form-control" placeholder="insert your name" [(ngModel)]="service.selectedUser.name" required >
</div>
<div class="form-group">
<label for="email">Email : </label>
<!-- 입력 여부를 파악하기 위한 구분자 required 추가 -->
<input type="text" name="email" id="email" class="form-control" placeholder="insert your email" [(ngModel)]="service.selectedUser.email" required>
</div>
<div class="form-group">
<label for="password">Password : </label>
<!-- 입력 여부를 파악하기 위한 구분자 required 추가 -->
<input type="text" name="password" id="password" class="form-control" placeholder="insert your password" [(ngModel)]="service.selectedUser.password" required>
</div>
<div class="form-row">
<div class="d-grid gap-2 d-md-flex justify-content-md-end">
<!-- [disabled]="!form.valid : 미입력한 항목(required)이 있을 경우, disable 처리 -->
<button class="btn btn-sm btn-block btn-primary col-lg-2" [disabled]="!form.valid" >submit</button>
<button class="btn btn-sm btn-block btn-secondary col-lg-2">clear</button>
</div>
</div>
</form>
</div>
</div>
<br>
<div class="row">
...
</div>
</div>